Have you ever experienced a mysterious clicking noise while coasting on your bicycle? If so, you’re not alone! In this article, we unravel the mystery behind that pesky clicking sound that can disrupt an otherwise peaceful ride. Whether you’re a seasoned cyclist or a casual bike enthusiast, this guide will help you identify the potential causes of the noise and provide simple solutions to get you back on the road without the annoying click. Say goodbye to that pesky sound and enjoy a smooth, silent ride with our helpful tips and tricks.
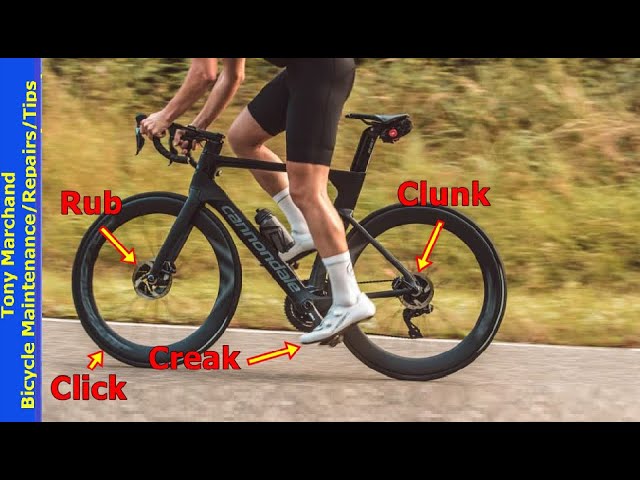
This image is property of qph.cf2.quoracdn.net.
Potential Causes of Clicking Noise
Loose chain or cassette
One potential cause of a clicking noise when coasting on a bicycle is a loose chain or cassette. Over time, the chain can become stretched or the cassette can become worn, resulting in a loose connection between the two. This looseness can cause the chain to slip and create a clicking sound.
Worn bearings
Another potential cause of a clicking noise is worn bearings. Bearings are used in various parts of the bicycle, such as in the wheels, bottom bracket, and headset. If these bearings become worn or damaged, they can create a clicking sound when they rotate.
Misaligned derailleur
A misaligned derailleur can also be a culprit for a clicking noise. The derailleur is responsible for shifting the chain from one gear to another. If the derailleur is not properly aligned, it can rub against the chain and create a clicking noise as the chain moves across the gears.
Damaged freewheel
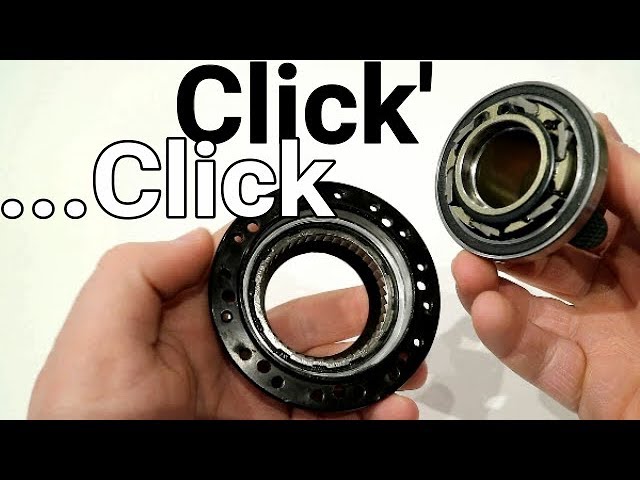
A damaged freewheel can also cause a clicking noise. The freewheel is the mechanism that allows the rear wheel to spin independently of the pedals when coasting. If the freewheel becomes worn or damaged, it can create a clicking sound when coasting.
Loose pedals
Loose pedals can also be a potential cause of clicking noise. If the pedals are not securely tightened onto the crank arms, they can move slightly and create a clicking sound when pressure is applied.
Loose spokes
Loose spokes can also contribute to a clicking noise. Spokes are the thin metal rods that connect the rim of the wheel to the hub. If these spokes become loose, they can move and create a clicking sound as the wheel rotates.
Misadjusted brake pads
Misadjusted brake pads can also cause a clicking noise. If the brake pads are not properly aligned with the rim, they can rub against the tire and create a clicking sound when coasting.
Faulty bottom bracket
A faulty bottom bracket can also be a potential cause of clicking noise. The bottom bracket is the part of the bike that houses the crankset and allows it to rotate smoothly. If the bottom bracket becomes worn or damaged, it can create a clicking sound.
Damaged chainring
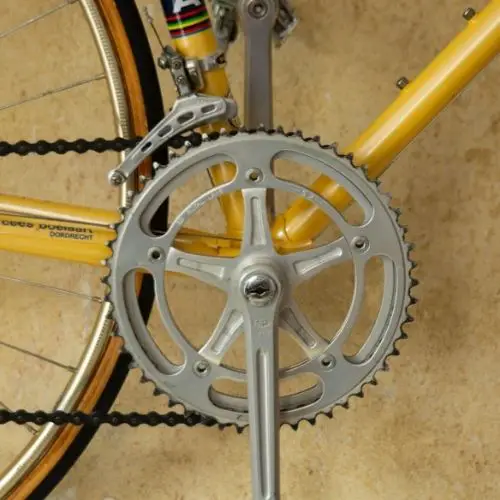
A damaged chainring can also contribute to a clicking noise. The chainring is the toothed disc that the chain connects to and is responsible for transferring power from the pedals to the rear wheel. If the chainring becomes damaged or worn, it can create a clicking sound when pedaling.
Worn jockey wheels
Finally, worn jockey wheels can also be a potential cause of clicking noise. Jockey wheels are part of the rear derailleur and guide the chain onto the gears. If these wheels become worn, they can create a clicking sound as the chain moves across them.
Troubleshooting Steps
Step 1: Inspect the chain and cassette
To troubleshoot and fix a clicking noise, the first step is to inspect the chain and cassette. Check for any signs of wear or looseness in the chain, such as stretching or rust. Also, examine the cassette to ensure that it is securely attached to the rear wheel and that the teeth are not worn or damaged. If any issues are found, it may be necessary to replace the chain or cassette.
Step 2: Check the bearings
Next, check the bearings in various parts of the bicycle, including the wheels, bottom bracket, and headset. Spin each wheel and listen for any clicking or grinding sounds. If any issues are detected, the bearings may need to be replaced or serviced.
Step 3: Adjust the derailleur alignment
If the clicking noise is suspected to be caused by a misaligned derailleur, it is important to adjust the alignment. This can be done using a derailleur alignment tool, which allows for precise adjustment of the derailleur position. Follow the instructions provided with the tool to ensure proper alignment.
Step 4: Examine the freewheel
To examine the freewheel, use a freewheel removal tool to remove it from the rear wheel. Inspect the freewheel for any signs of damage or wear, such as bent or missing teeth. If any issues are found, it may be necessary to replace the freewheel.
Step 5: Tighten the pedals
If loose pedals are believed to be the cause of the clicking noise, use a pedal wrench to tighten them securely onto the crank arms. Ensure that both pedals are tightened evenly to avoid any imbalance.
Step 6: Check and tighten the spokes
To address the issue of loose spokes, use a spoke wrench to check the tension of each spoke. Turn the wrench clockwise to tighten any loose spokes, ensuring that they are tightened evenly around the wheel.
Step 7: Adjust the brake pads
If misaligned brake pads are causing the clicking noise, adjust them so that they are aligned with the rim of the wheel. Use an Allen key to loosen the brake pad mounting bolt, align the pad correctly, and then retighten the bolt. Repeat this process for each brake pad.
Step 8: Inspect the bottom bracket
To inspect the bottom bracket, use a bottom bracket tool to remove it from the bike frame. Examine the bottom bracket for any signs of wear or damage, such as grinding or clicking sounds when spun by hand. If any issues are found, the bottom bracket may need to be replaced.
Step 9: Check the chainring
Inspect the chainring for any signs of damage or wear, such as bent or missing teeth. If any issues are found, it may be necessary to replace the chainring.
Step 10: Replace the jockey wheels
If worn jockey wheels are believed to be the cause of the clicking noise, they can be replaced using a jockey wheel removal tool. Remove the old jockey wheels and install the new ones, ensuring that they are securely attached to the rear derailleur.

This image is property of i.ytimg.com.
Tools Required
- Chain whip: Used to hold the cassette in place while removing or tightening the lockring.
- Cassette lockring tool: Used to remove and tighten the lockring on the cassette.
- Bike bearing wrench: Used to adjust and service the bearings in various parts of the bicycle.
- Derailleur alignment tool: Used to precisely adjust the alignment of the derailleur.
- Freewheel removal tool: Used to remove and replace the freewheel.
- Pedal wrench: Used to tighten or remove the pedals.
- Spoke wrench: Used to adjust the tension of the spokes.
- Allen key set: Used to adjust brake pad mounting bolts.
- Bottom bracket tool: Used to remove and replace the bottom bracket.
- Chainring bolt tool: Used to remove and replace chainring bolts.
- Jockey wheel removal tool: Used to remove and replace the jockey wheels.

This image is property of bs23.b-cdn.net.
Step-by-Step Guide
Step 1: Inspect the chain and cassette
1.1. Start by thoroughly examining the chain for any signs of wear or damage. Look for rust, stretched links, or loose connections. 1.2. Next, inspect the cassette to ensure it is securely attached to the rear wheel. Check the teeth for any signs of wear or damage. 1.3. If any issues are found with the chain or cassette, consider replacing them.
Step 2: Check the bearings
2.1. Begin by spinning each wheel and listening for any clicking or grinding sounds. 2.2. If any issues are detected, use a bike bearing wrench to service or replace the bearings as needed. 2.3. Repeat this process for the bottom bracket and headset bearings.
Step 3: Adjust the derailleur alignment
3.1. Use a derailleur alignment tool to accurately adjust the alignment of the derailleur. 3.2. Follow the instructions provided with the tool to ensure the derailleur is properly aligned. 3.3. Test the bike to see if the clicking noise has been resolved.
Step 4: Examine the freewheel
4.1. Use a freewheel removal tool to remove the freewheel from the rear wheel. 4.2. Inspect the freewheel for any signs of damage or wear, such as bent or missing teeth. 4.3. If any issues are found, consider replacing the freewheel.
Step 5: Tighten the pedals
5.1. Use a pedal wrench to securely tighten the pedals onto the crank arms. 5.2. Ensure that both pedals are tightened evenly to avoid any imbalance.
Step 6: Check and tighten the spokes
6.1. Use a spoke wrench to check the tension of each spoke on the wheel. 6.2. Turn the spoke wrench clockwise to tighten any loose spokes. 6.3. Ensure that the spokes are tightened evenly around the wheel.
Step 7: Adjust the brake pads
7.1. Use an Allen key to loosen the brake pad mounting bolt. 7.2. Align the brake pad with the rim of the wheel. 7.3. Retighten the mounting bolt. 7.4. Repeat this process for each brake pad.
Step 8: Inspect the bottom bracket
8.1. Use a bottom bracket tool to remove the bottom bracket from the bike frame. 8.2. Examine the bottom bracket for any signs of wear or damage, such as grinding or clicking sounds. 8.3. If any issues are found, consider replacing the bottom bracket.
Step 9: Check the chainring
9.1. Inspect the chainring for any signs of damage or wear, such as bent or missing teeth. 9.2. If any issues are found, consider replacing the chainring.
Step 10: Replace the jockey wheels
10.1. Use a jockey wheel removal tool to remove the old jockey wheels from the rear derailleur. 10.2. Install the new jockey wheels, ensuring they are securely attached. 10.3. Test the bike to see if the clicking noise has been resolved.

This image is property of i.ytimg.com.
Preventive Measures
Regular bike maintenance
Regular bike maintenance is essential in preventing various issues, including clicking noise. By regularly inspecting and servicing the components of the bicycle, potential problems can be identified and addressed before they develop into more significant issues.
Proper lubrication
Applying the appropriate lubricant to the necessary parts of the bike can help reduce friction and prevent excessive wear. Regularly lubricating the chain, cassette, derailleur, and other moving parts can minimize the likelihood of clicking noises occurring.
Correct torque settings
Ensuring that all bolts and fasteners on the bike are tightened to the correct torque settings can help prevent loosening and subsequent clicking noises. Using a torque wrench when assembling or adjusting components can help achieve the desired torque.
Proper storage
Properly storing the bike can also help prevent clicking noises. When not in use, store the bike in a dry, clean environment to minimize the risk of moisture, dirt, or other contaminants entering the components and causing issues.
By following these preventive measures and regularly maintaining the bike, riders can minimize the risk of clicking noises and enjoy smoother and quieter rides.

This image is property of bikesfaq.com.


